Lip liner may look like a small part of your makeup routine, but it can make a big difference in how your lips look. Whether you love soft nude lips, natural pink shades, or bold statement colors, the right lip liner can help create a more defined and polished appearance.
If you’re new to makeup, using lip liner might seem a little confusing. You may wonder which shade to choose, how to outline your lips, or whether your lip liner should be lighter or darker than your lipstick. With so many products and techniques available, finding the right one can take some time.
The good news is that applying lip liner doesn’t require professional makeup skills. Once you understand the basics, you can easily create beautiful lip looks at home.
In this complete lip liner guide, we’ll explain everything beginners need to know, including different types of lip liners, how to choose the right shade, step-by-step application techniques, buying tips, and common mistakes to avoid.
What Is Lip Liner?
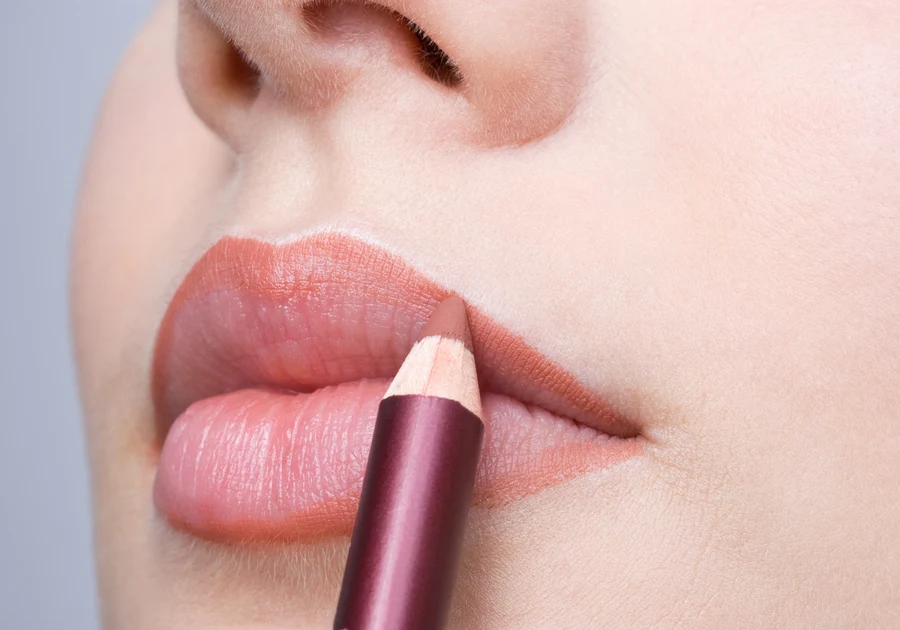
Lip liner is a makeup product used to outline, define, and enhance the natural shape of your lips. It usually comes in pencil or creamy retractable formulas and is available in different colors and finishes.
Many people use lip liner before applying lipstick to create a clean outline and prevent color from spreading beyond the natural lip line. It can also be used to fill in the entire lip area, creating a base that helps lipstick look more even.
Lip liner isn’t only for professional makeup looks or special occasions. A simple nude or brown lip liner can make everyday makeup look more complete.
Why Is Lip Liner Important in Your Makeup Routine?
Adding lip liner to your makeup routine has several benefits:
- Defines your lips: It creates a cleaner and more noticeable lip shape.
- Makes lips look fuller: Subtle overlining can give the appearance of naturally fuller lips.
- Helps prevent lipstick bleeding: It creates a defined border that can reduce lipstick feathering.
- Improves lipstick application: It makes applying lipstick around the edges easier and neater.
- Adds dimension: Combining a darker liner with lighter lipstick creates depth and definition.
- Works without lipstick: You can wear lip liner alone with a little lip balm or gloss for a natural look.
Different Types of Lip Liners You Should Know
Choosing the right lip liner becomes easier when you understand the different formulas available. Some offer precise application, while others are designed for smooth blending and comfortable wear.
Here are four popular types worth considering.
1. Traditional Pencil Lip Liner
Traditional pencil lip liners are a great choice for beginners because they provide good control during application. Their slightly firm texture makes it easier to follow your natural lip shape.
You can sharpen the pencil whenever you need a precise tip. They are available in various shades, including nude, pink, brown, red, and berry.
2. Retractable Lip Liner
Retractable lip liners are convenient because they don’t require a sharpener. You simply twist the pencil to reveal more product.
Many formulas have a creamy texture that glides smoothly across the lips. They’re especially useful for people who want something easy to carry in their makeup bag.
3. Creamy Lip Liner
If you prefer a smooth application, creamy lip liners are worth trying. They glide easily over the lips and are generally simple to blend.
These liners work well for creating soft, natural-looking lip combinations. However, their staying power can vary depending on the formula.
4. Matte and Long-Wearing Lip Liner
Matte lip liners are designed to provide a more defined finish. Many are formulated to stay in place for longer, making them useful for parties, special occasions, and busy days.
However, some matte formulas can feel dry, so choose one that feels comfortable on your lips.
How to Choose the Right Lip Liner Shade
Choosing a flattering lip liner shade doesn’t have to be difficult. The best place to start is by considering your natural lip color, favorite lipstick shades, and personal makeup preferences.
1. Start With a Nude Lip Liner
A nude lip liner is one of the most versatile products to have in your makeup collection. It works with many lipstick shades and is perfect for simple everyday looks.
Choose a nude shade that complements your natural lip color instead of selecting one that looks completely different from your complexion.
2. Experiment With Brown Lip Liner
Brown lip liner is a popular choice for creating soft, defined lips. It pairs beautifully with nude, peach, caramel, and pink lipsticks.
For an easy everyday look, outline your lips with a medium brown liner, blend the edges slightly inward, and finish with a nude lipstick or clear gloss.
3. Match Your Lip Liner With Your Lipstick
If you’re a beginner, choosing a liner close to your lipstick shade is an easy way to achieve a balanced appearance.
Here are some simple combinations:
- Pink lipstick with rosy pink lip liner.
- Red lipstick with a matching red liner.
- Nude lipstick with beige or soft brown liner.
- Berry lipstick with a deeper berry liner.
- Peach lipstick with a warm nude liner.
4. Consider Your Skin Undertone
Your skin undertone can help you find lip liner shades that complement your complexion.
- Warm undertones: Caramel, terracotta, peach, and warm brown shades.
- Cool undertones: Mauve, berry, rosy pink, and cool brown shades.
- Neutral undertones: Both warm and cool shades can work beautifully.
These are general suggestions, not strict rules. Always choose shades that make you feel comfortable and confident.
How to Apply Lip Liner: A Step-by-Step Guide for Beginners
Learning how to apply lip liner is easier when you take your time. You don’t need to create a perfect outline in one attempt. Small, gentle strokes usually give better control.
Step 1: Prepare Your Lips
Start with clean lips. If your lips feel dry or flaky, gently smooth them with a damp, soft cloth.
Apply a little lip balm and allow it to absorb before using your liner. This helps create a smoother surface for makeup application.
Step 2: Follow Your Natural Lip Shape
Look in the mirror and identify your Cupid’s bow, lower lip line, and the corners of your mouth.
If you’re new to lip liner, following your natural lip shape is the easiest way to achieve a balanced result.
Step 3: Outline Your Upper Lip
Begin at the Cupid’s bow and move toward the corners of your mouth using short, gentle strokes.
Avoid applying too much pressure. Building the color gradually makes it easier to correct small mistakes.
Step 4: Define Your Lower Lip
Move to your lower lip and carefully follow its natural outline.
Try to keep both sides balanced. You can make small adjustments as you go instead of drawing the entire outline at once.
Step 5: Blend the Lip Liner
Use a fingertip or small lip brush to gently blend the liner toward the center of your lips.
Blending creates a softer transition between the liner and lipstick, helping your makeup look more natural.
Step 6: Apply Your Favorite Lipstick
Fill in your lips with your preferred lipstick shade. Make sure to blend the color smoothly with the lip liner.
A small lip brush can help you achieve a more precise finish, especially around the corners.
Step 7: Add Lip Gloss (Optional)
If you prefer a glossy appearance, apply a little lip gloss to the center of your lips.
This finishing touch adds shine and can make your lips appear softer and more dimensional.
How to Make Your Lips Look Fuller With Lip Liner
You don’t need complicated makeup techniques to create the appearance of fuller lips. A few simple adjustments can make your lips look more defined and voluminous.
Try these easy techniques:
- Slightly overline the center: Draw just outside your natural lip line around the middle of your upper and lower lips.
- Keep the corners natural: Avoid overlining too much around the corners because it can make the result look unnatural.
- Choose a slightly deeper liner: A darker shade around the edges can create a subtle contouring effect.
- Blend toward the center: Soften the liner instead of leaving a noticeable dark border.
- Use lighter lipstick: Apply a lighter shade to the center of your lips to create dimension.
- Add a little gloss: A touch of shine can make your lips appear fuller.
The secret is to keep the technique subtle. Your natural lip shape should still look balanced.
Best Lip Liner and Lipstick Combinations to Try
Sometimes, choosing the right color combination makes all the difference. You don’t always need matching shades to create a beautiful lip look.
Here are some combinations worth experimenting with:
| Lip liner shade | Lipstick shade | Overall look |
|---|---|---|
| Soft brown | Nude beige | Natural everyday makeup |
| Chocolate brown | Caramel nude | Warm and defined lips |
| Rose pink | Light pink | Fresh and soft |
| Mauve | Dusty rose | Elegant everyday look |
| Burgundy | Deep red | Bold and glamorous |
| Medium brown | Peach nude | Modern nude lips |
If you’re just starting out, a medium brown or nude liner is a practical first purchase because it works with several lipstick shades.
Common Lip Liner Mistakes Beginners Should Avoid
Even though lip liner is easy to use, a few common mistakes can affect the final result.
Here are some things to avoid:
- Choosing a shade that’s too dark: A very dark outline with pale lipstick can look harsh if it isn’t blended properly.
- Overlining too much: Drawing far beyond your natural lip shape can make your makeup look uneven.
- Skipping lip preparation: Dry or flaky lips can make liner application look patchy.
- Applying too much pressure: Heavy strokes can create thick lines that are difficult to blend.
- Forgetting to blend: Blending helps your liner and lipstick look more natural together.
- Ignoring the lip corners: Uneven corners can make the overall lip shape look unbalanced.
- Using a blunt pencil: A dull tip can make precise application more difficult.
Lip Liner Buying Guide: What Should You Look For?
With so many lip liner options available, choosing the right product can feel overwhelming. Instead of purchasing products based only on packaging or trends, focus on the formula, texture, and shades that suit your needs.
Here are some practical buying tips:
- Smooth texture: Choose a liner that glides comfortably without pulling at your lips.
- Good pigmentation: Look for a product that provides even color without requiring too many layers.
- Easy blending: Creamy formulas are often easier for beginners to work with.
- Comfortable finish: If your lips are naturally dry, avoid formulas that feel excessively drying.
- Long-lasting performance: Consider long-wearing formulas if you want your lip color to stay in place for longer.
- Versatile shades: Start with one nude or brown shade before building a larger collection.
- Authentic products: Buy from trusted sellers and check the packaging and expiry information.
Popular Lip Liner Brands Worth Exploring
If you’re looking for lip liner options, these popular makeup brands are worth exploring:
- NYX Professional Makeup: Offers a variety of lip liner shades and textures for different makeup preferences.
- Maybelline: A popular choice for accessible everyday makeup products.
- MAC Cosmetics: Known for its extensive range of lip pencils and classic shades.
- Charlotte Tilbury: Offers lip liners designed for polished and defined lip looks.
- ColourPop: Provides different lip liner colors and finishes at accessible price points.
Before purchasing, check the available shades, current prices, and product authenticity.
Frequently Asked Questions About Lip Liner
1. Should Lip Liner Be Darker Than Lipstick?
Not necessarily. You can choose a liner that matches your lipstick or is one shade deeper for added dimension. The right choice depends on your preferred makeup style.
2. Can I Wear Lip Liner Without Lipstick?
Yes! Lip liner looks beautiful on its own. Fill in your lips with your favorite liner and add a little lip balm or gloss for a simple everyday look.
3. Should I Apply Lip Liner Before or After Lipstick?
It’s generally easier to apply lip liner before lipstick because it helps define your natural lip shape. You can make small adjustments to the outline afterward if needed.
4. How Can I Make Lip Liner Last Longer?
Start with clean, dry lips. Outline and lightly fill in your lips with liner before applying lipstick. Blot gently with tissue if necessary.
5. Which Lip Liner Shade Is Best for Beginners?
A nude or medium brown shade is a great starting point. These colors are versatile and can be paired with several lipstick shades.
6. Can Lip Liner Make Thin Lips Look Fuller?
Yes. Subtle overlining around the center of your lips, combined with careful blending and a little gloss, can create the appearance of fuller lips.
7. Is Lip Liner Necessary for Everyday Makeup?
No, lip liner is optional. However, it can help create a more defined lip shape and make everyday lipstick application look neater.
Final Thoughts
Lip liner is a simple makeup essential that can make your lips look more defined, balanced, and polished. Whether you prefer soft nude shades, warm brown combinations, or bold statement lips, the right liner can help you create the look you want.
If you’re just starting out, keep things simple. Choose a comfortable formula, begin with a versatile shade, and practice following your natural lip shape. Once you become familiar with the technique, you can experiment with different colors, finishes, and fuller-looking lip effects.
Remember, makeup is all about expressing your personal style. You don’t need a professional makeup kit or an expensive product collection to create beautiful lips. With a little practice and the right lip liner, you can make your everyday makeup routine easier and more enjoyable.